Selected class name
 button next to the 'Selected class name' property and choosing a class from a list of pre-defined CSS class names.
The second approach is to type a new CSS class name next to the property and then define that CSS class in the Form View Builder's CSS tab.
"/>
button next to the 'Selected class name' property and choosing a class from a list of pre-defined CSS class names.
The second approach is to type a new CSS class name next to the property and then define that CSS class in the Form View Builder's CSS tab.
"/>Description
Once an item is designated as being selectable (by checking the 'Selectable' property in Item Properties)
then it is possible to define a class for how that item will appear when it is selected. The class for selected items can be
defined two ways. One is by clicking the button next to the 'Selected class name' property and choosing a class from a list of pre-defined CSS class names.
The second approach is to type a new CSS class name next to the property and then define that CSS class in the Form View Builder's CSS tab.
Using Pre-defined Classes
Click the
button next to the Selected class name property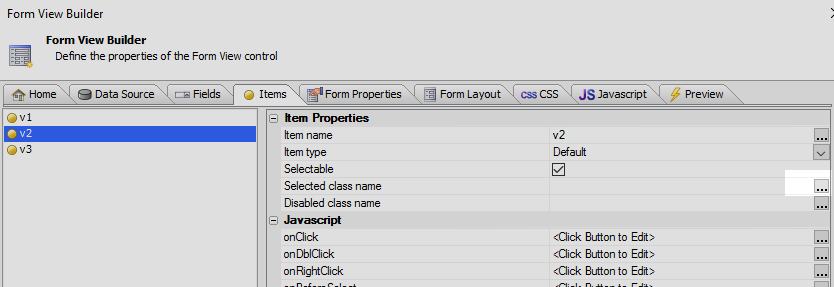 Open the Class names dialog
Select a predefined class, double click the desired class to add it to the Selected CSS Class Names menu, then click OK.
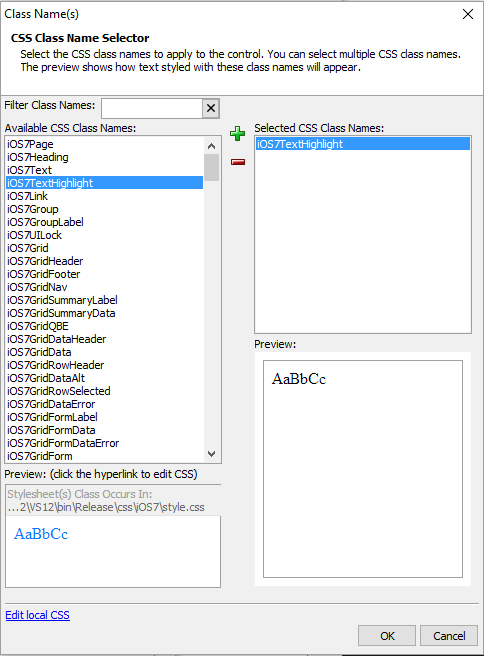 iOS7 TextHighlight option.
View the Component in Live Preview. For a full guide to implementing selected items see the Selectable property.
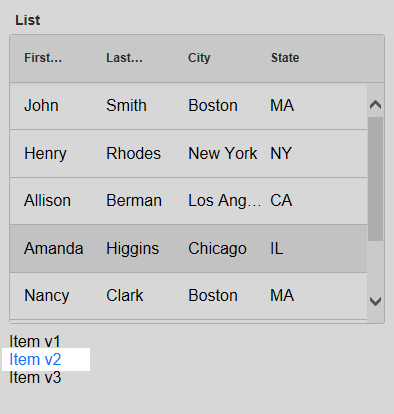 iOS7 TextHighlight on selected item in Live Preview.
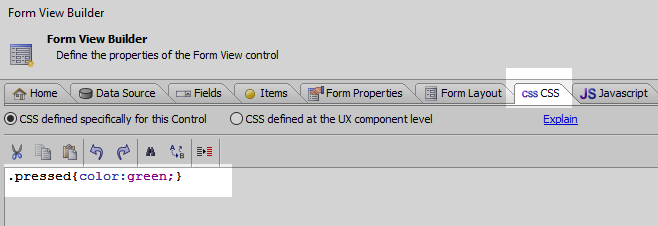
Defining Custom CSS Class names
Type the desired class name next to the Selected class name property.
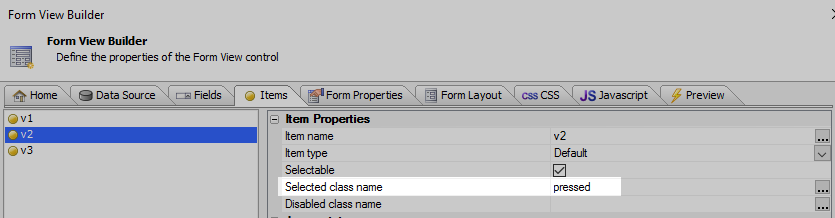 Assigning a selected class named 'pressed'.
On the Form View Builder's CSS tab, define the CSS for the class. The period in front of the class name will designate it as being a class.
 Defining the 'pressed class' on the CSS tab.
View the Component in Live Preview. For a full guide to implementing selected items see the Selectable property.
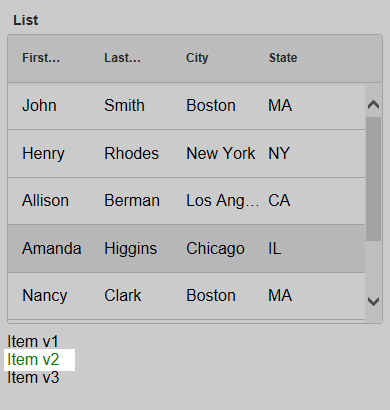 The defined class in Live Preview.